Understanding Servlet Development in NetBeans

Creating First Servlet Application using Netbeans IDE
In the last lesson we created our first Servlet Application but without using any IDE. An IDE is Integrated Development Environment, and it makes creating applications a lot easier. We will learn how to create Servlet applications on NetBeans IDE and Eclipse IDE. Then you can decide which one, you want to use.
Using Intregrated Development Enviroment(IDE) is the easiest way to create Servlet Applications. An IDE is a software application that provides facilities to computer programmers for software development. Eclipse, MyEcplise, Netbeans are example of some popular Java IDE.
Steps to Create Servlet Application in Netbeans IDE
To create a servlet application in Netbeans IDE, you will need to follow the following (simple) steps :
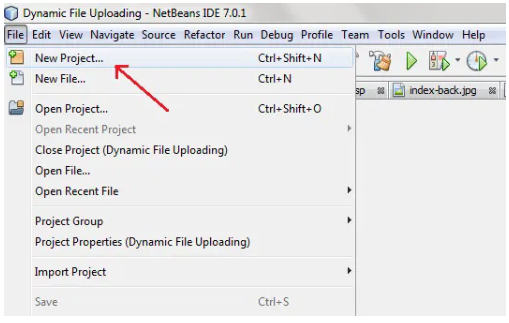
Open Netbeans IDE, Select File -> New Project
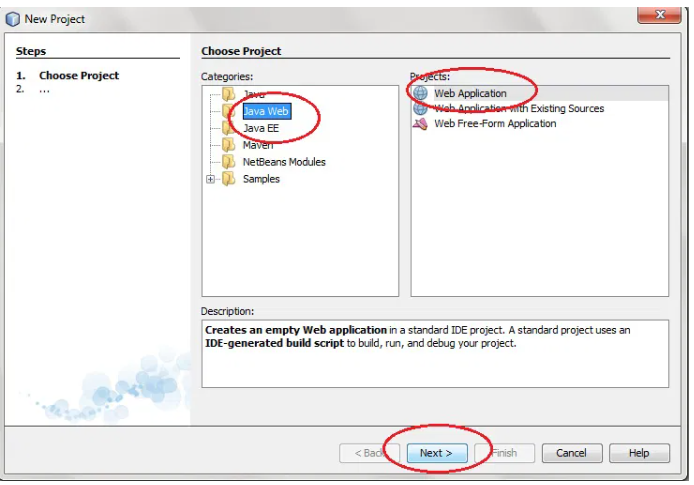
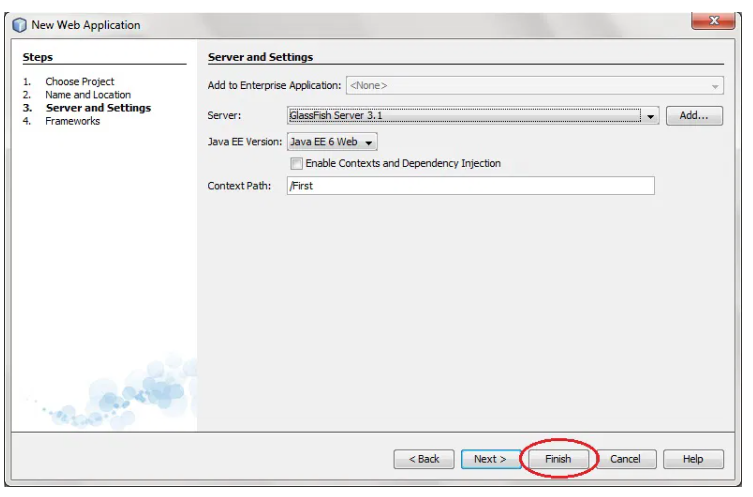
Select Java Web -> Web Application, then click on Next,
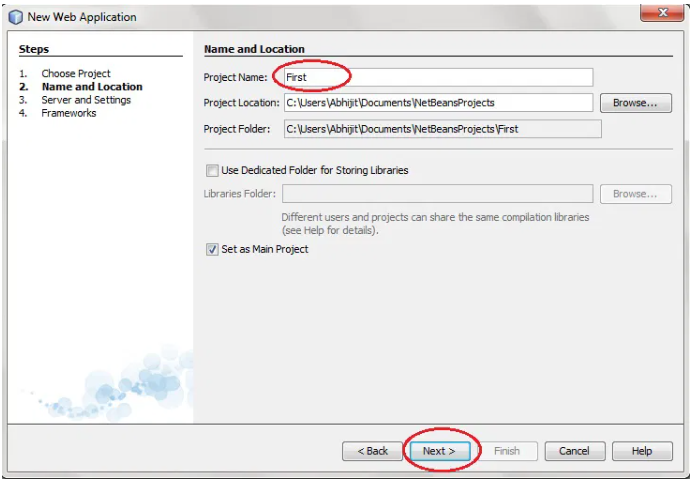
Give a name to your project and click on Next,
and then, Click Finish
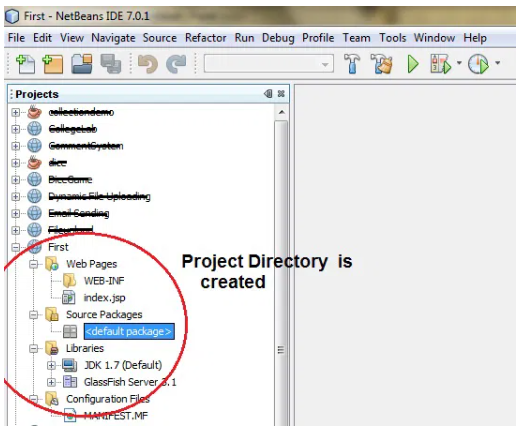
The complete directory structure required for the Servlet Application will be created automatically by the IDE.
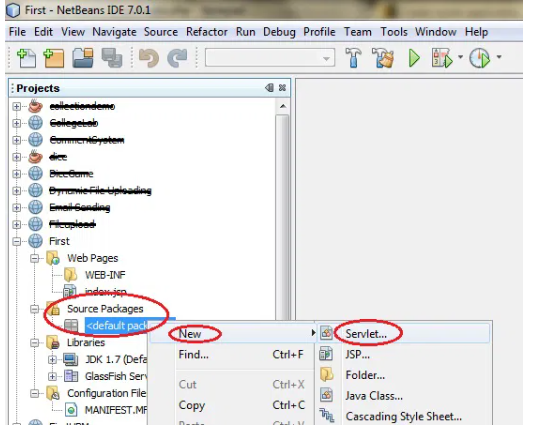
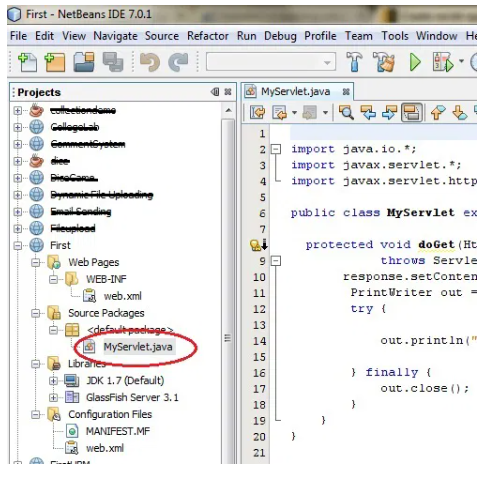
To create a Servlet, open Source Package, right click on default packages -> New -> Servlet.
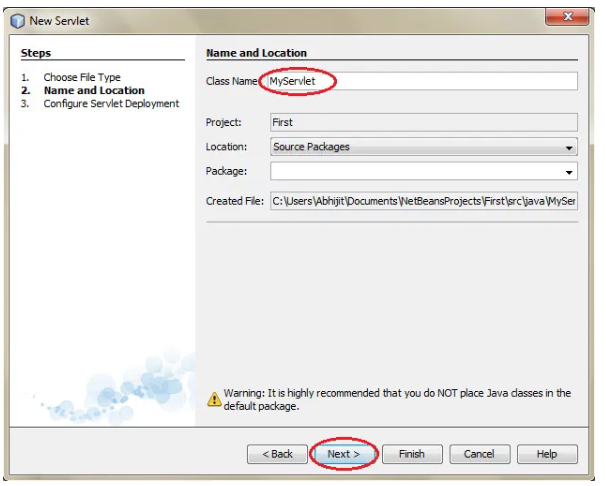
Give a Name to your Servlet class file,
Now, your Servlet class is ready, and you just need to change the method definitions and you will good to go.
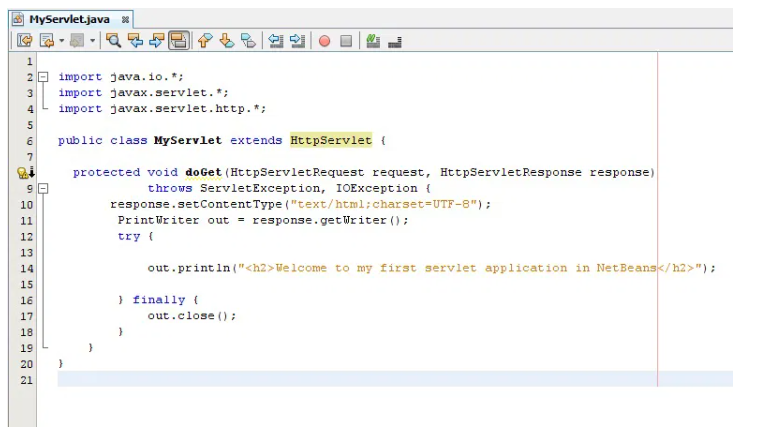
Write some code inside your Servlet class.
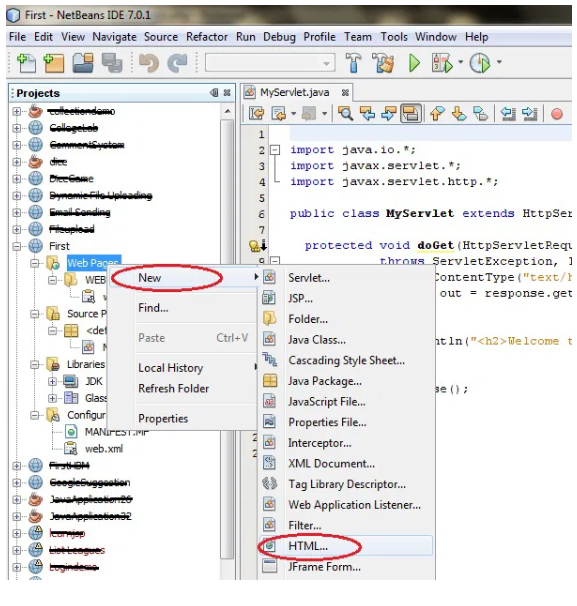
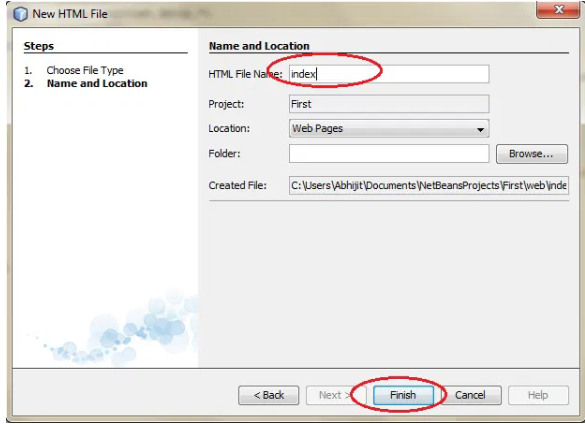
Create an HTML file, right click on Web Pages -> New -> HTML
 11. Give it a name. We recommend you to name it index, because browser will always pick up the index.html file automatically from a directory. Index file is read as the first page of the web application
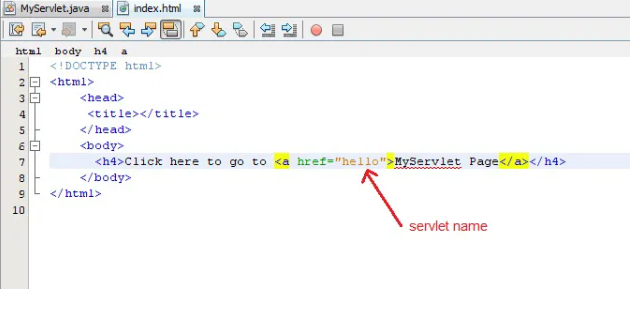
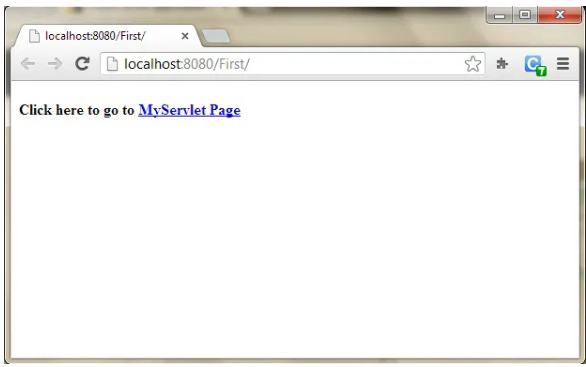
12. Write some code inside your HTML file. We have created a hyperlink to our Servlet in our HTML file.
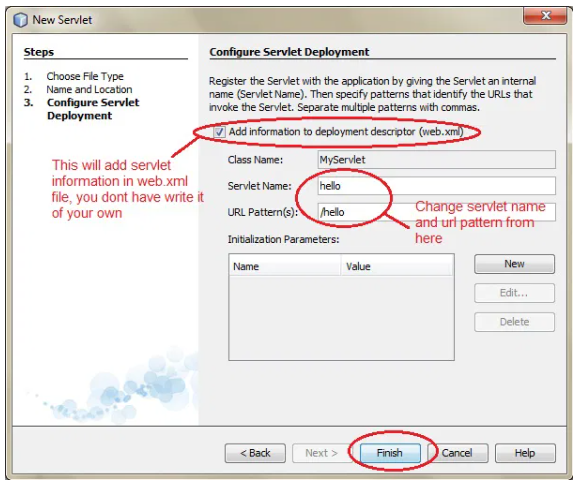
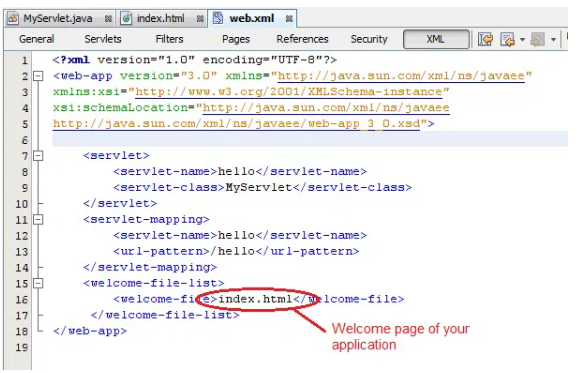
13. Edit web.xml file. In the web.xml file you can see, we have specified the url-pattern and the servlet-name, this means when hello url is accessed our Servlet file will be executed.
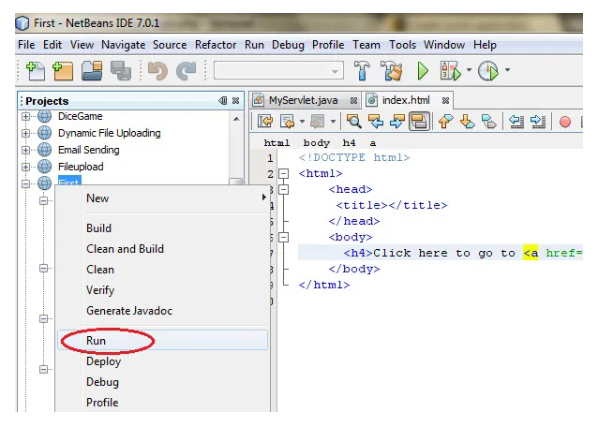
14. Run your application, right click on your Project and select Run
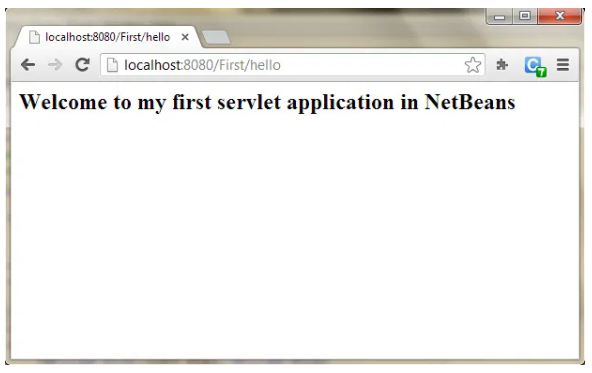
15. Click on the link created, to open your Servlet.
16. Hurray! Our First Servlet class is running.